
@name, a scope badge (Built in, Personal or Workspace), the description and how many skills and tools the agent has.
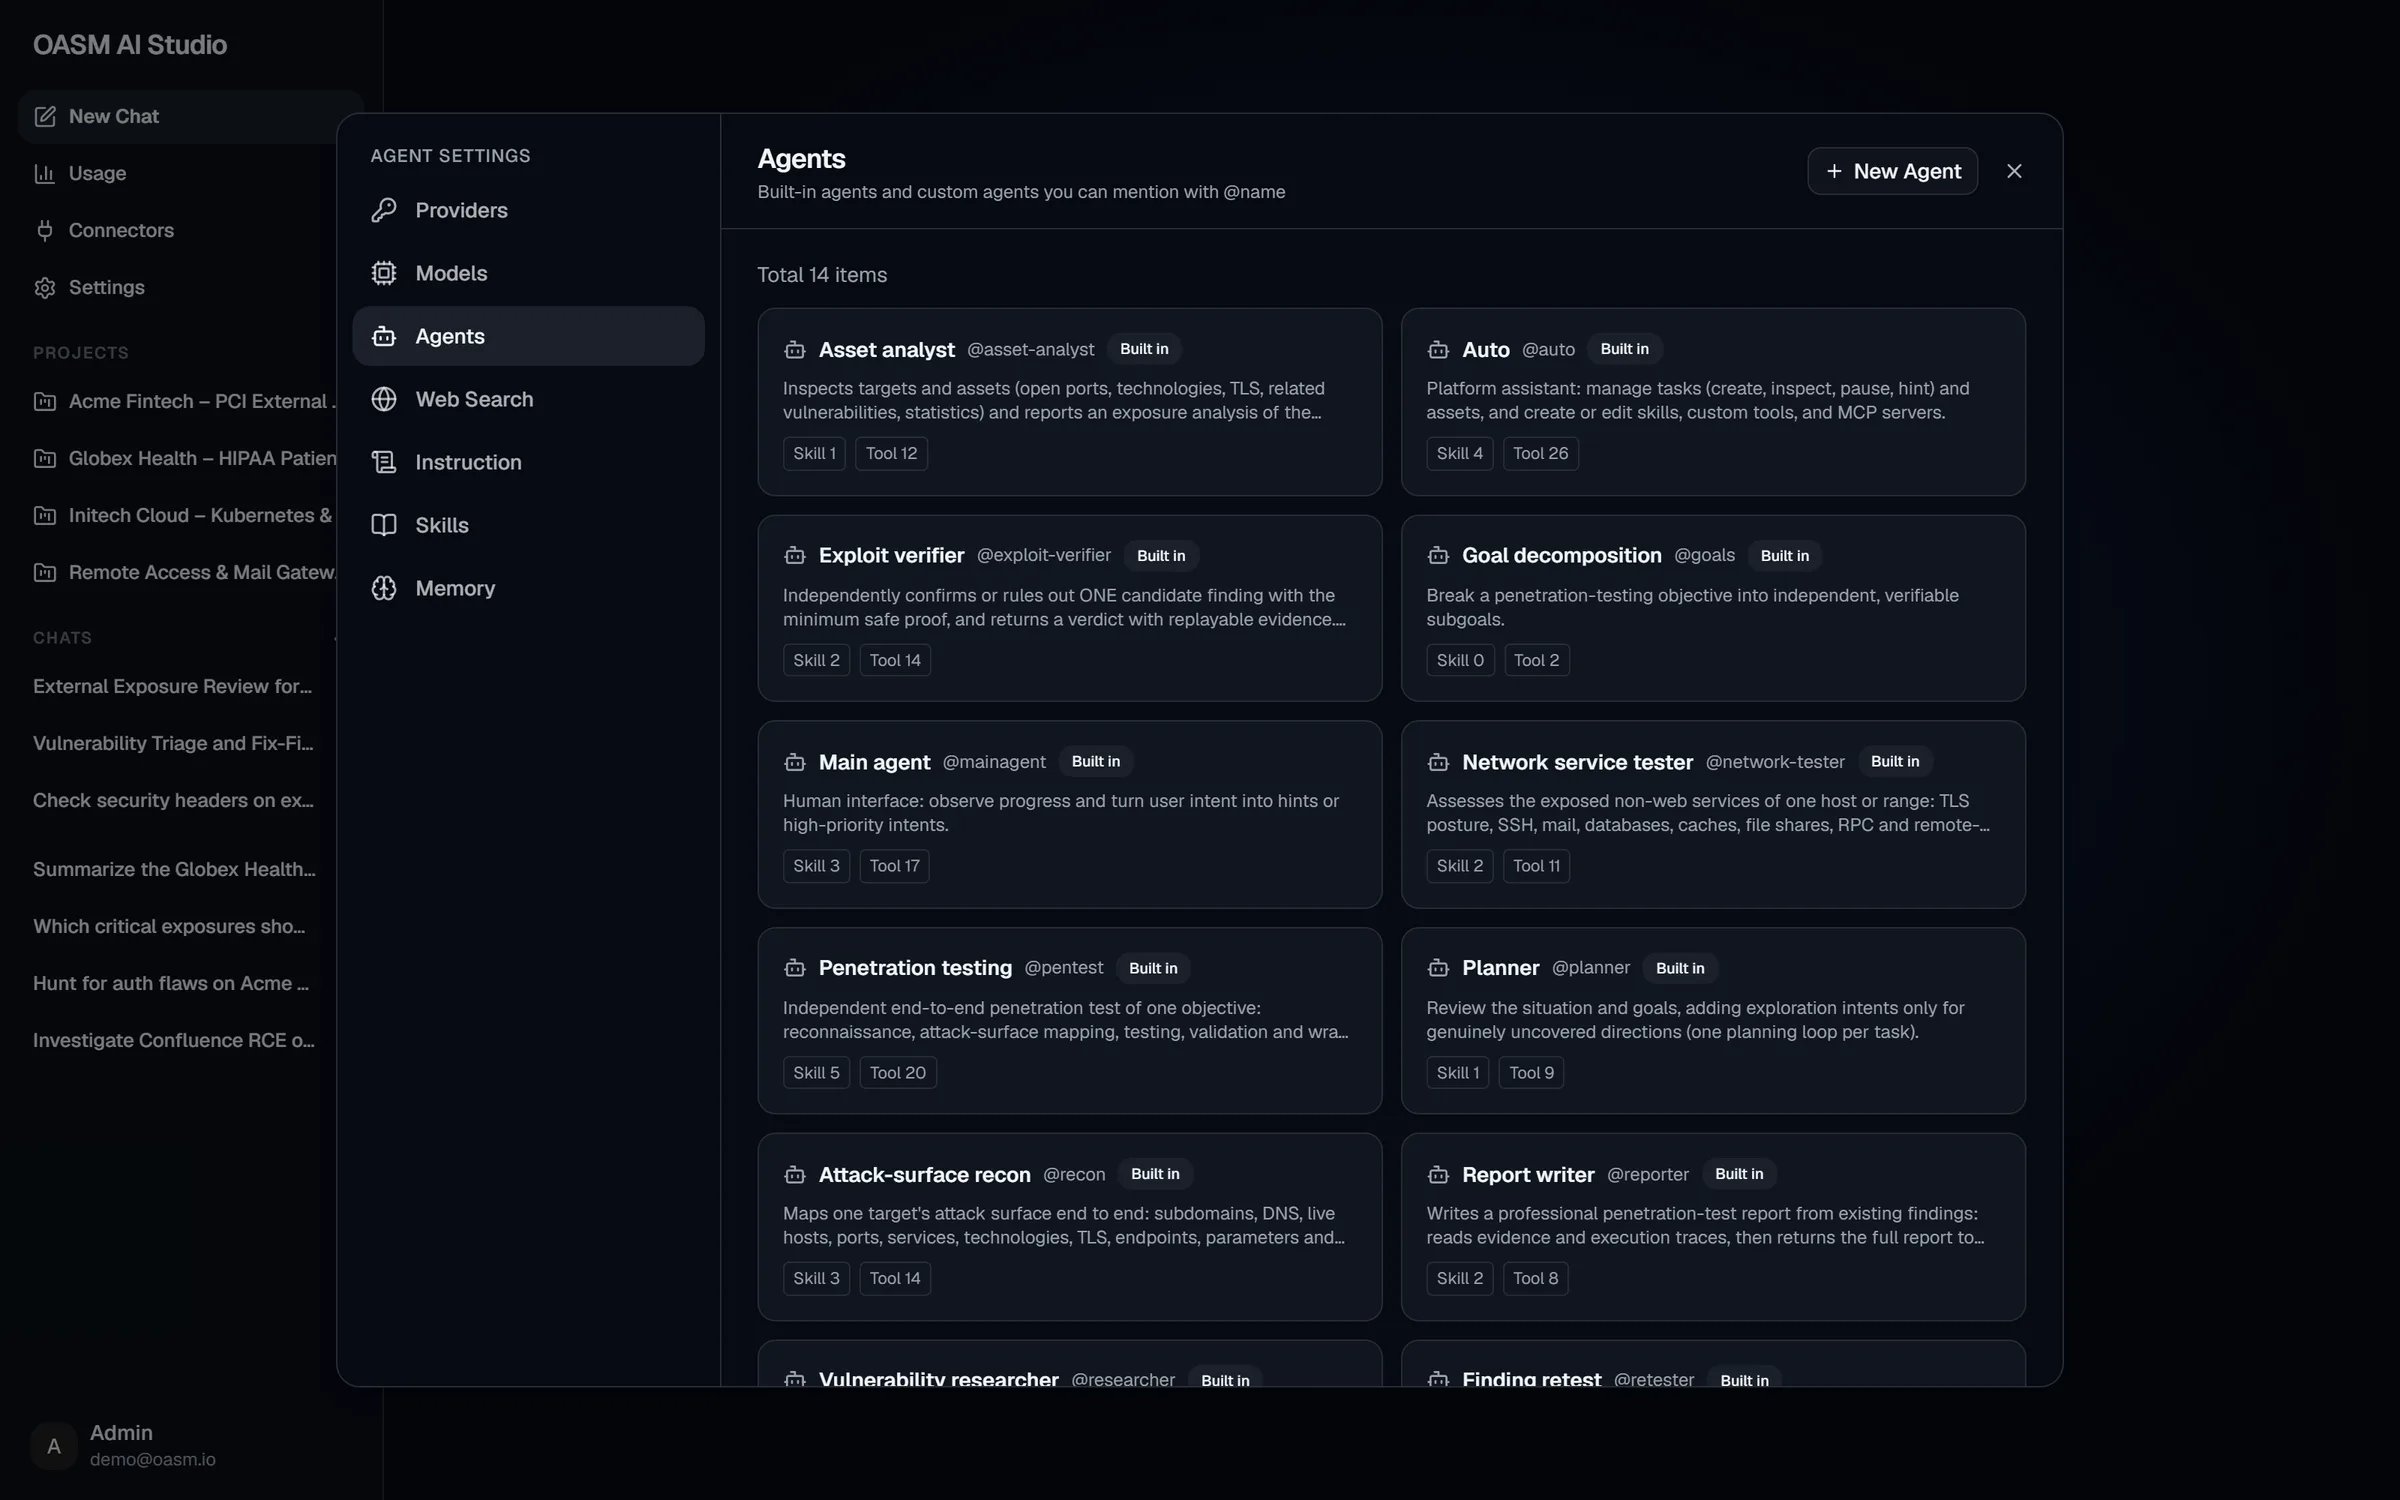
Settings → Agents lists the built-in agents first, then the custom agents you can see
How agents are used
- Agent mode only. The main agent delegates only in Agent mode. In Ask mode it answers by itself and no agent is dispatched.
- Which agents can be dispatched. Every agent whose mode is subagent or all, built-in or custom, is offered to the main agent with its
@name, display name and description. Agents in primary mode are listed in settings but are not offered for delegation. - @mentions. To ask for a specific agent, name it in your message, for example
@recon map the attack surface of example.com. The composer does not autocomplete names; the main agent reads the mention, matches it against the agents it can dispatch and sends that agent a brief. Each@nameresolves to exactly one agent, because names are unique across built-in, workspace and personal agents. - Edits apply on the next run. A subagent loads its agent definition when it starts, so changes you save apply to later dispatches. A queued subagent whose agent was deleted fails with an error.
Built-in agents
Built-in agents ship with OASM and are read-only. Click a card to read its full system prompt.
When a multi-step task finishes and Report writer is available, the main agent dispatches it to produce the final report.
A built-in agent dispatched as a subagent runs the command and connector tools it declares without approval prompts, in Manual mode too, because the plan it serves was already approved. Built-in safety checks (the command deny list and the target scope check) still apply. A custom agent in a chat that is not in Auto mode gets read-only tools only. See Plans and approvals.
Create a custom agent
1
Open the New Agent sheet
In AI Studio, open Settings → Agents and click New Agent in the header. The New Agent sheet opens with the subtitle “Configure a new assistant persona”.
2
Fill in Identity & Role
Set Agent Name and its scope, and optionally Display Name and Description. Pick a Mode: choose subagent or all if you want the main agent to be able to dispatch it.
3
Set Model & Parameters (optional)
Leave these empty to use your defaults, or set Override Model, Thinking Variant, Temperature, Top P and Max steps.
4
Write the system prompt
Under System Prompt, describe the agent’s role, method and what it should hand back.
5
Save
Click Create Agent. The console confirms with “Agent created” and the new card appears in the list.
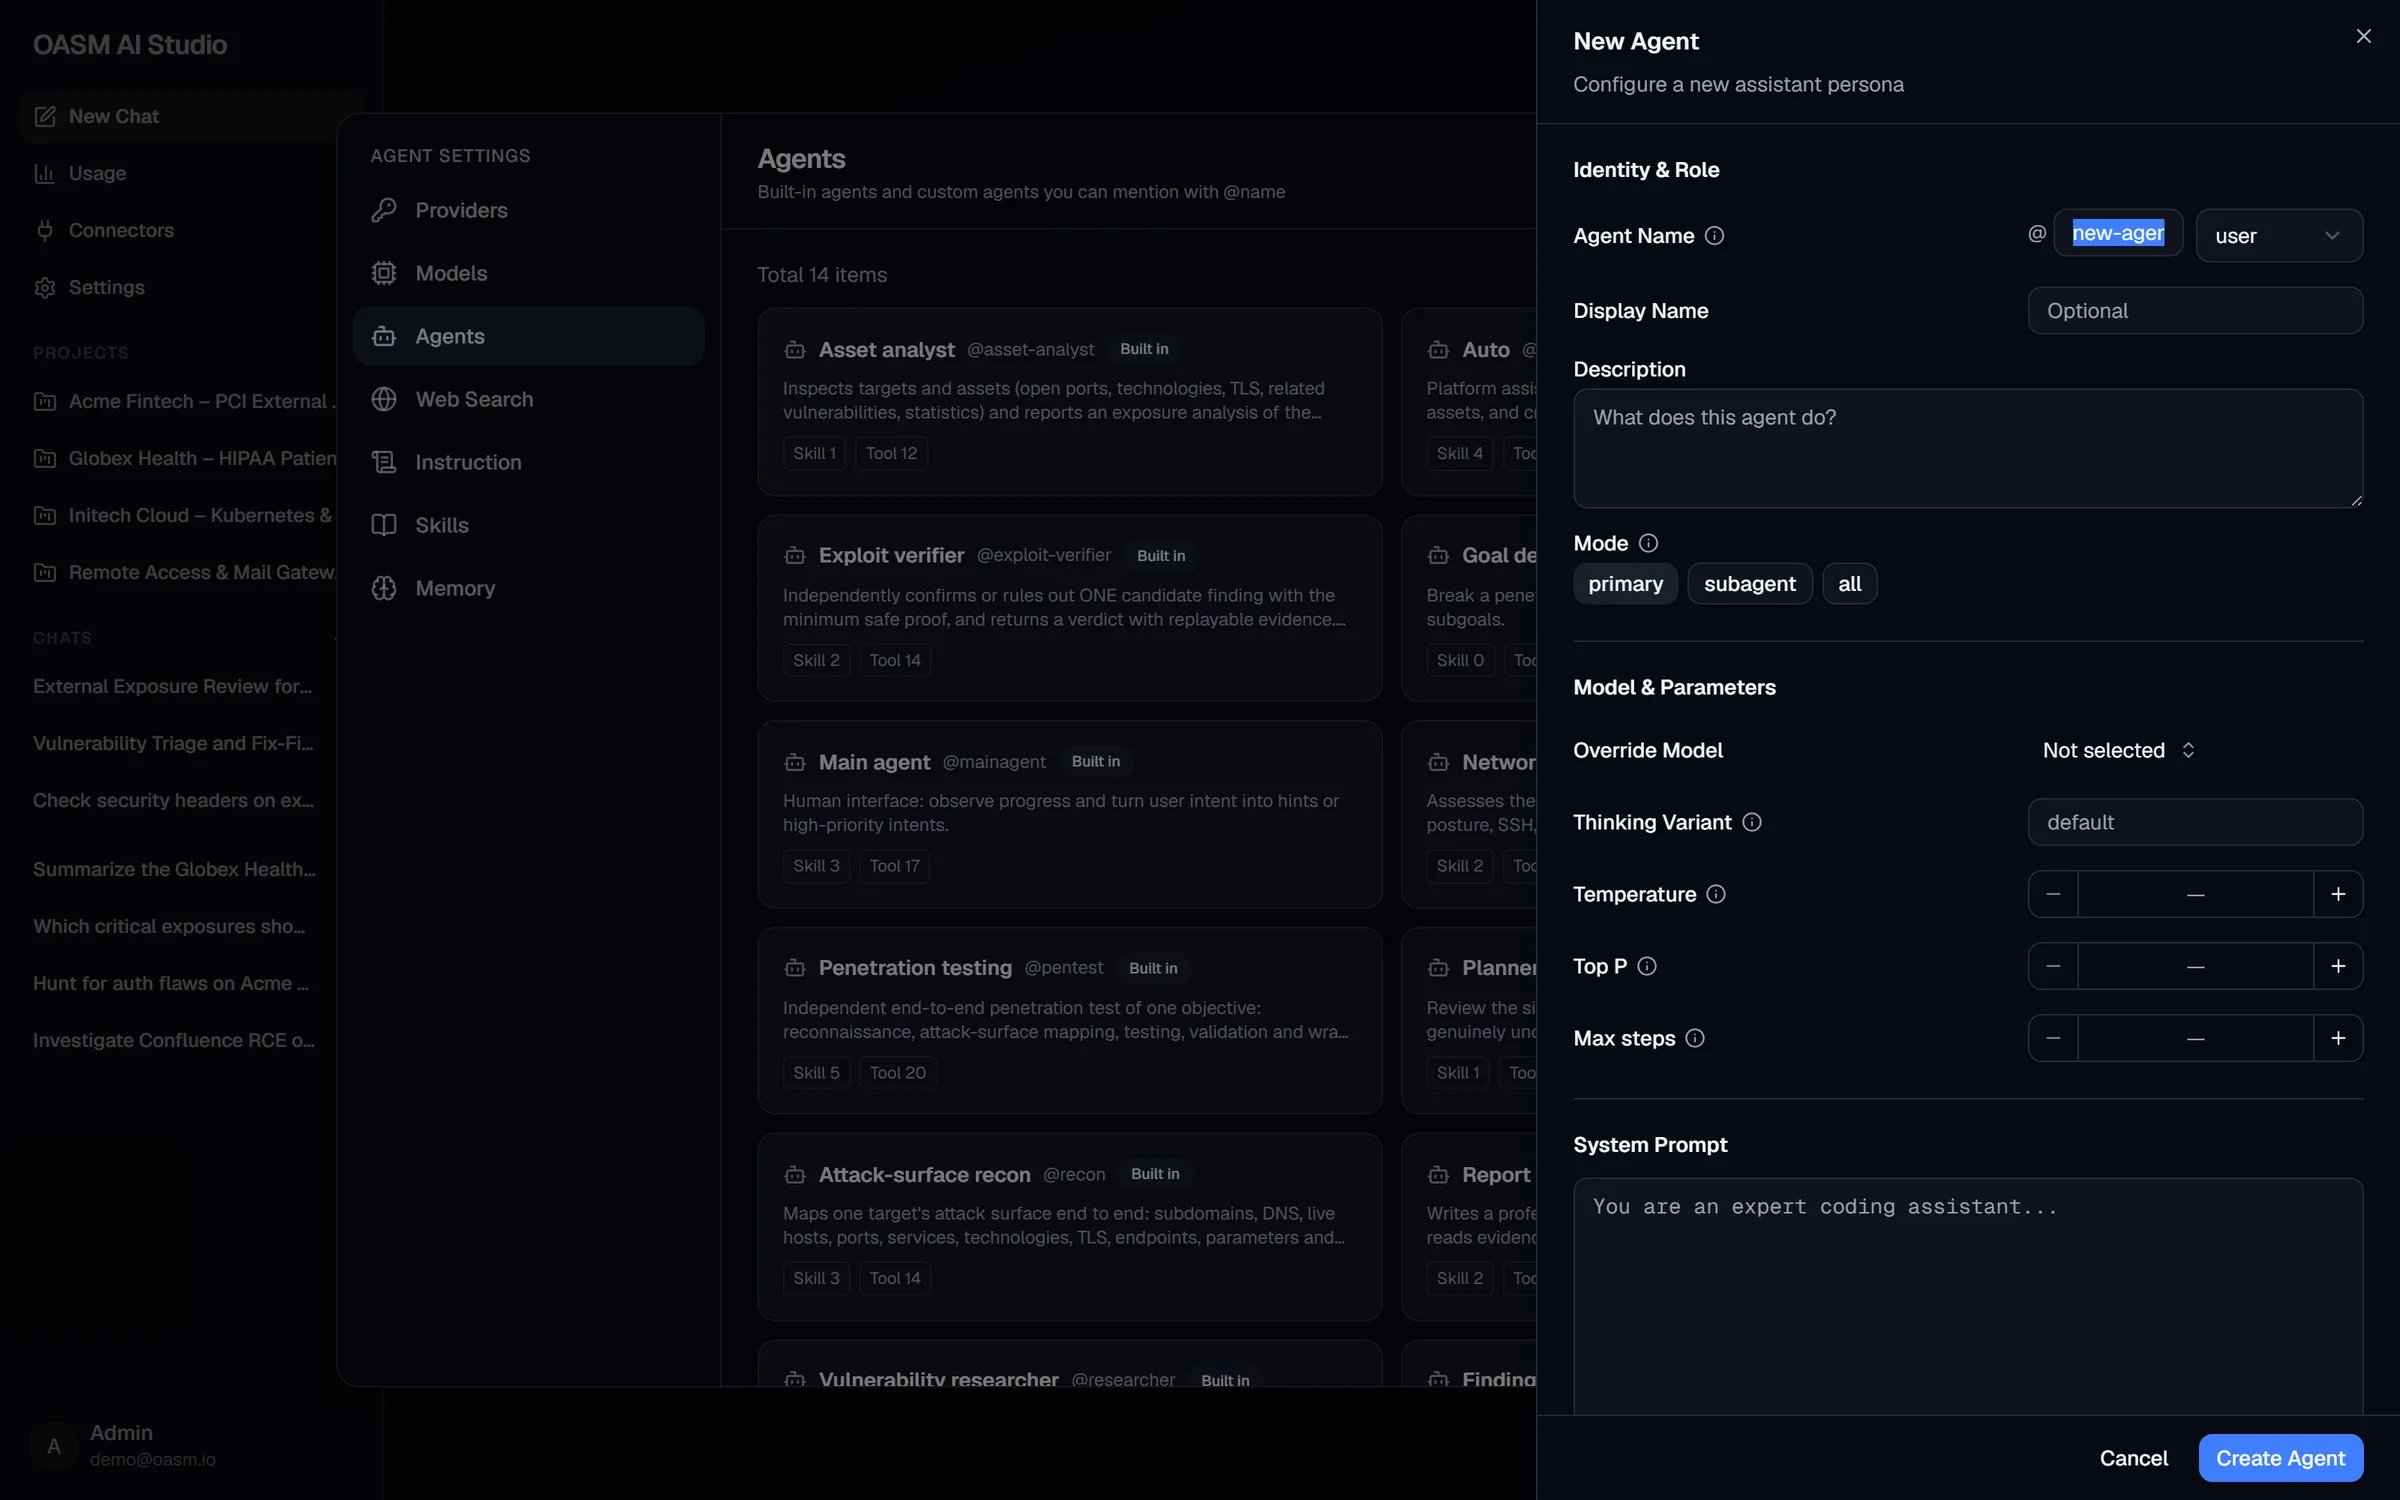
The New Agent sheet
Fields
The console form has no tool or skill picker. A custom agent created in the console runs with the read-only workspace lookup tools and no skills. The agent definitions API (
/api/agents/definitions) also accepts tools and skills lists in metadata.
Override Model points at one of your own provider connections. When another member’s chat uses a workspace agent you created, your connection is not theirs, so the run falls back to the model of their chat. Thinking Variant is saved with the agent; in the current release subagent runs take their reasoning effort from the model connection rather than from this field.
Naming rules
The console checks the pattern as you type and shows “Lowercase letters, numbers and single dashes only”. The API also refuses a name that would make an@mention ambiguous:
- A built-in agent name is reserved: the save fails with
"@name" is a built-in agent. - A personal agent may not use the name of a workspace agent, and a workspace agent may not use a name any member already uses for a personal agent. The save fails with
Agent "@name" already exists. - Two of your own personal agents cannot share a name.
Edit or delete a custom agent
1
Open the agent
In Settings → Agents, click the agent’s card. The sheet title is the display name, or
@name when there is none.2
Change the fields
Edit any field, including the name and the scope. Changing the name or scope runs the same name checks as creating.
3
Save or delete
Click Save Changes (“Agent updated”). To remove the agent, click Delete, then confirm Delete in the Delete Agent dialog. Deleting cannot be undone.
- Built-in agents show “Built-in agent (read only)”.
- Workspace agents created by another member show “Shared by another workspace member (read only)”.
Permissions
The list you see contains the built-in agents, every workspace agent and your own personal agents. Other members’ personal agents are never shown to you. See Permissions.
Related
Skills
The instruction sets agents load on demand
Models
Default and subagent models
Side panel
Follow subagents while they run
Plans and approvals
What runs with and without your approval